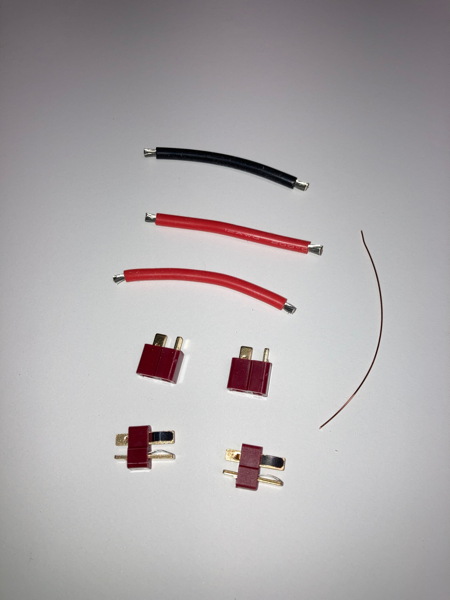
Materials required for assembly
Arming an electric RC airplane can be dangerous if the battery compartment is not easily accessible. With an arming plug, it is not necessary to access the battery compartment to arm or disarm the airplane.
Here is an accessory that fits between the battery and ESC, with a plug that supplies power when inserted and cuts it when removed. It is mounted in a convenient place for access.
Materials:
Two sets of connectors
12 gauge silicon insulated wire
Heat Shrink tubing
Bare copper wire
Epoxy putty
Tools:
40W soldering iron
Wire stripper
Solder
Paste Flux
Sponge
"Helping Hands" soldering holder
Making this accessory requires quite a few soldering connections that are easy to do only if certain rules are followed:
-Allow time for the iron to come to temperature.
-Always use flux. The flux in the solder core is not enough for these larger solder connections. Bare metal oxidizes immediately when heat is applied and oxidation prevents solder from flowing. Flux prevents oxidation. You can use acetone to clean off the excess flux after cooling.
-Plug in the mate of the connector before soldering. Heating the connector while soldering softens the plastic and having the mate in place keeps the connector straight.
-Presolder connector tabs and wire.
-Wipe hot iron tip on wet sponge often.
-Apply the heat opposite the area you apply the solder. Allow the heat to rise up through the connection. The solder will flow towards the heat.
-Put a little solder on the tip of the iron to make a broader contact to heat more efficiently.
-Stop as soon as you're done. More solder is not better.
-The alligator clips on the soldering holder work as a heat sink, so heat shrink tubing is protected until you slide it down over the solder joint.
I like to tie a string to the plug and attach it somewhere on the airplane so as not to lose it.
Note there are two female connectors. They are not interchangable. The connector with the two red wires gets mounted on the airplane and the plug goes into it.
Do not connect the battery to the plug with the two red wires!
Things go south very quickly if you do. Been there.
Materials required for assembly

Tools required. Note the paste flux, "helping hands" soldering tool, and damp sponge.
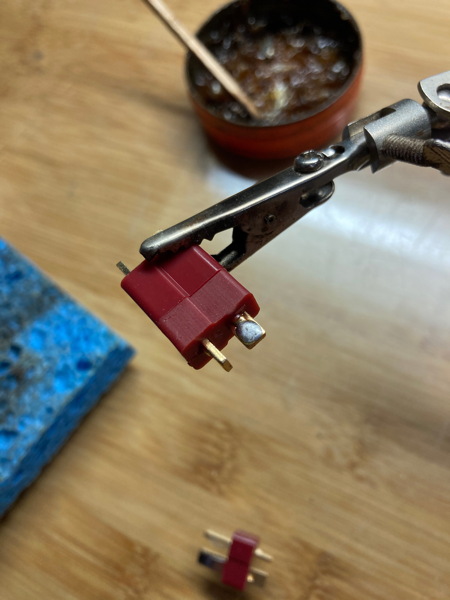
Pre-solder the connection
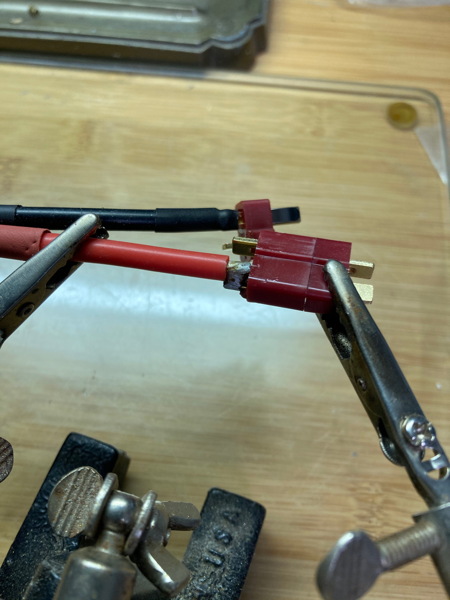
The alligator clips on the soldering holder work as a heat sink, so heat shrink tubing is protected until you slide it down over the solder joint. Note also that the mate is attached to the connector to guard against heat distortion of the plastic.
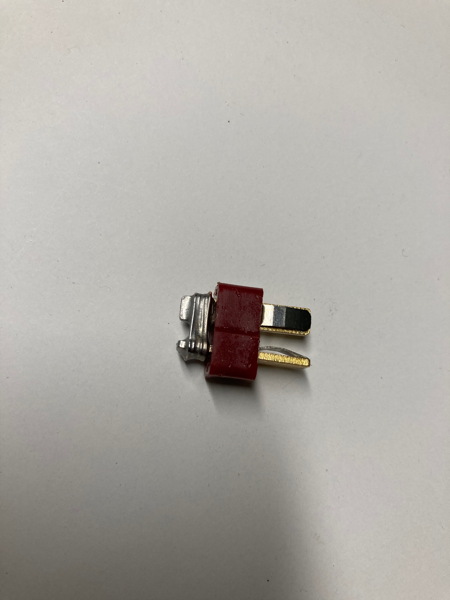
The arming plug soldered. Acetone was used to clean off excess flux. Epoxy putty was formed around this to act as a handle to pull the plug
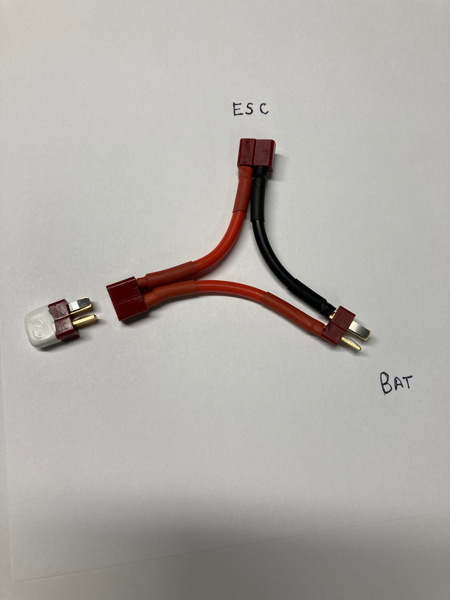
The completed project. Note there are two female connectors.
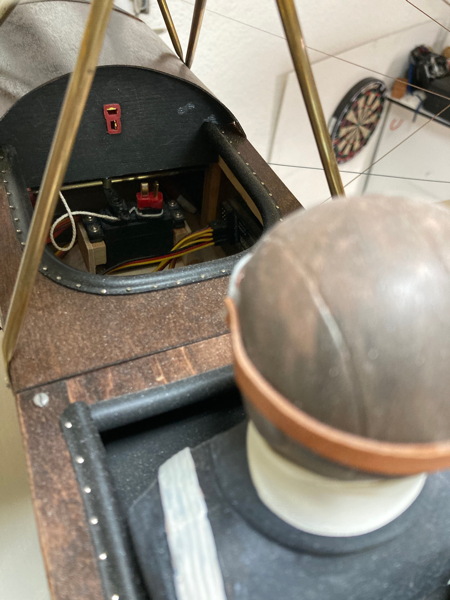
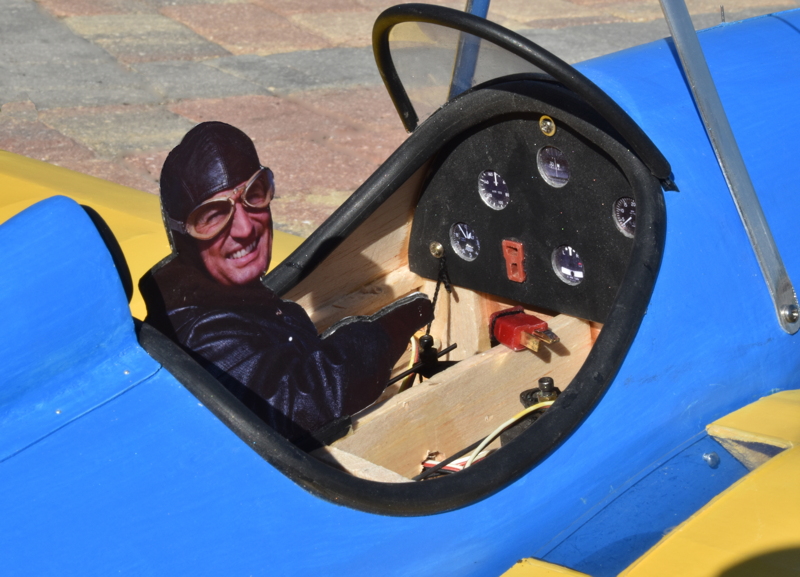
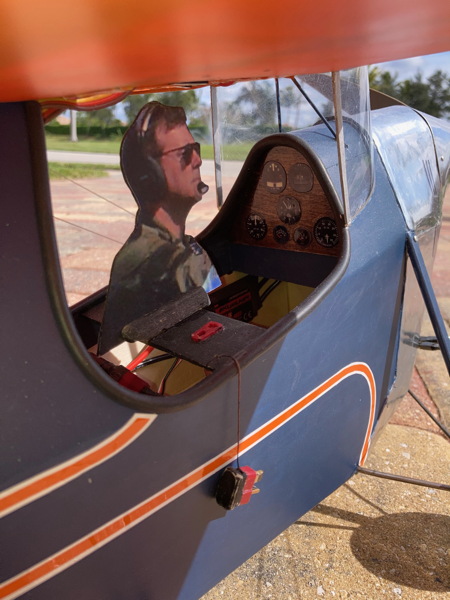
Arming plug installed in an Antic Bipe
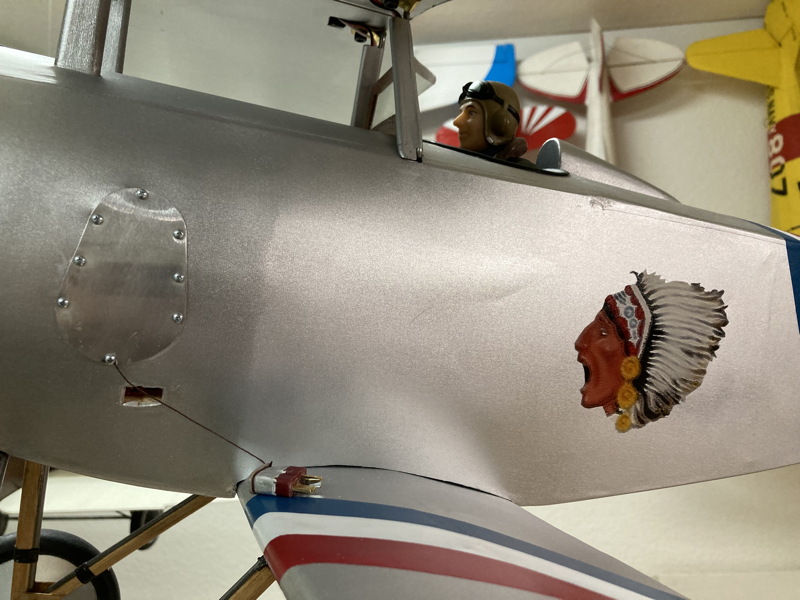
Arming plug installed in a Nieuport 17. The female was inset about a quarter inch.
Arming plug installed in an Aeronca C-1